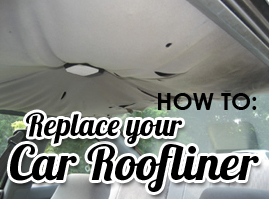
How To Replace Car Headlining/Roofliner

OTHER THINGS YOU MIGHT NEED
Apart from the products available from www.homeupholsterer.com.au you may also require:
- Bristle brush or light sandpaper
- Screwdrivers
STEP-BY-STEP INSTRUCTIONS
1. Remove the existing headlining
- Remove all the trim surrounding the headlining
- Unscrew/remove any items attached to the headlining including: sun visors, rear-view mirror, grab handles, dome lights
- Unclip clips/fasteners that are holding the headlining board in place
- Remove side trim panels (take extra care as plastic panels can easily break)
- Carefully remove front and rear trim panels
- Slide the headlining board out of the vehicle (ensuring to this carefully and with enough clearance so not to damage the board).
- Set the board on a flat work surface.
- Peel off the old material from the car headlining board
2. Remove the old foam and glue
- Use a bristle brush or lightweight sandpaper to scrape the remaining foam off the headlining board.
Tip: Be gentle but thorough as this will affect the overall finish of your new headlining
3. Prepare the new headlining velour material
- Spread your new headlining velour fabric over the headlining board (with the foam side lying against the board and the fabric facing up)
- Ensure that you have smoothed out any folds or wrinkles
4. Gluing the fabric to the board
Tip: Be very careful – the adhesive bonds on contact – so once glued the two surfaces will begin to stick immediately.
- Complete the adhesive process in two parts, by gluing half the fabric at a time.
- To do this, fold half of the headlining velour fabric back onto itself, leaving half of the headlining board exposed
- Evenly spray the back of the headlining fabric as well as the exposed half headlining board in a sweeping side to side motion
- Gently stretch the adhesive coated fabric over the board, pressing and smoothing it with the palm of your hand
- Repeat the gluing and attaching steps with the remaining half
- Give the completed board a rub with the palms of your hands, to ensure all areas have adhered
Tip: Make sure your hands are clean
- Wait for the adhesive to dry
5. Cut the new headlining
- Turn the board over
- Using a sharp Stanley knife, carefully trim excess fabric from the around edges of the board. Allow for a 1.5cm border of fabric to tuck in during installation.
- Next, cut holes in the car headliner where the lights, seat belts, visors and clothes hangers need to be attached.
- Glue borders/overlapping material to back of board
- Wait for the adhesive to dry
6. Reinstall headlining in car
- Reinstall the headlining board in the vehicle
- Secure the headlining with the car's clips (if applicable)
- Replace all the panels, trim and accessories that you removed in the beginning
For more advice about the products needed to replace your car rooflining / headliner material, visit us at our Sydney showroom and warehouse, or order online for shipping around Australia.

